Chance Operations: Digital Photography/Geocache/Second Life
Published February 17th, 2015
Employing chance operations to create new works at the intersection of digital photography, Geocaching, and Second life, bridging both physical and virtual worlds.
Tools needed:
- Phone or computer with app access/internet connection to https://www.geocaching.com/ and/or the Google Play Store / Apple App Store.
- Phone or computer with GPS/location services enabled
- Digital camera
- Physical stopwatch or stopwatch app
- Coin with heads / tails designation
- Means of transportation to Geocache site
- Ability to download images from digital camera for view on default photo-viewing software or in a program like Photoshop
- Photo-editor like Photoshop or GIMP
- A download of Firestorm Viewer for Second Life (better for Wi-Fi connections than the default Second Life app)
Instructions:
1. Navigating the Site or App
Create an account on https://www.geocaching.com/ or utilize the Geocache app. Click on Find my location and allow permission for your location to be detected or enter the zip code of wherever you happen to be. Stay on the first page and close your eyes while your mouse is over the links in the Description column. Scroll up and down and click. Open your eyes. If you have opened a Geocache page, move to step 2. If not, try again.
2. Travel to Location
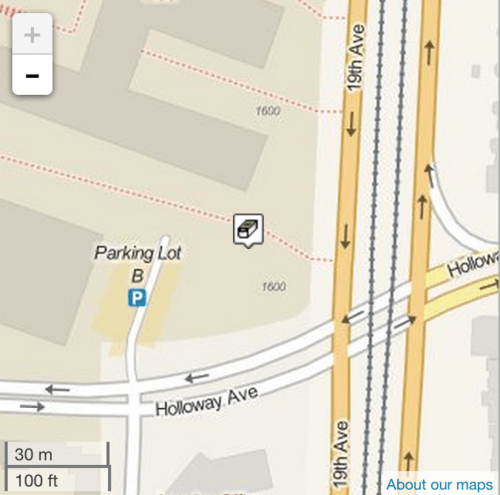
Visit GPS coordinates according to the Geocache description and bring your camera along with you.
3. 1st Coin Flip
When you arrive, flip a coin to determine whether you will try to find the cache or not. Heads means you must try to find the cache (no hints from the website allowed) and tails means that you cannot try to find it. If you happened to have landed on a cache that has coordinates listed but is noted as missing or has not been found since prior to 2013, go to the GPS coordinates regardless.
If heads, proceed to step 4. If tails – do not seek out the cache and move to step 7.
4. If Heads on First Coin Flip…
Seek out the cache according to the description and coordinates (again, no use of the hints under Additional Hints on the page). Use https://www.random.org/ and set the numbers from 1 to 30 to set the amount of minutes you’ll give yourself to find the cache using your stopwatch.
If you find the cache, move to step 5. If you cannot find the cache or were not accorded enough time to find it through randomization, move tostep 7.
5. Second Coin Flip
Flip a coin to determine whether you will photograph the cache or the environment nearby. Heads -> photograph the cache. Tails -> photograph the environment and return the cache to its place. If you get heads, open the cache and prepare to photograph its contents according to step 6. If you get tails, photograph the environment according to the instructions in step 7.
6. Photographing the Cache
If the cache has been found, set the cache in front of you and open it. If you have not been permitted to photograph the cache according to the second coin flip or were not able to find it, photograph the environment according to step 7 instead.
Center the cache in your viewfinder. The following are variables for your digital camera to be determined by chance:
– …whether to zoom out completely (heads), or zoom in completely (tails)
– …whether the flash is on (heads) or tails (tails)
– …aperture priority (heads) or shutter priority (tails). Count to ten as you move through the options of aperture or shutter speed and stop when you get to ten. That is your setting. Leave all other options as default.
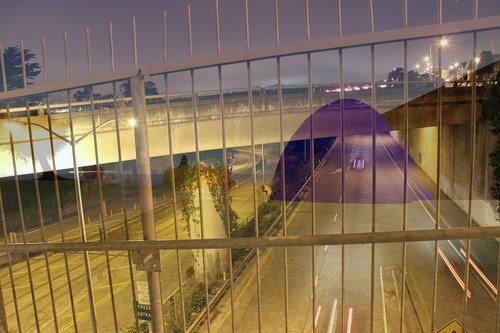
7. Photographing the Environment
Check GPS coordinates and stand as close to the exact coordinates as possible. Photograph whatever happens to be at eye-level from where you happen to be standing after focusing in. The following are variables for your digital camera to be determined by chance:
– …whether to zoom out completely (heads), or zoom in completely (tails)
– …whether the flash is on (heads) or tails (tails)
– …aperture priority (heads) or shutter priority (tails). Count to ten as you move through the options of aperture or shutter speed and stop when you get to ten. That is your setting. Leave all other options as default.
You may repeat this series of instructions more than once to generate further photo-taking opportunities.
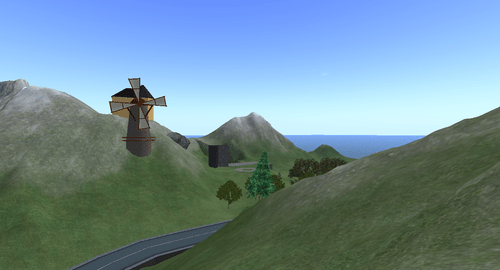
8. Second Life
You can now leave the location of the cache.
Download and create a Second Life account. Do not worry about the appearance of your avatar as that will not be important for what you do in the program.
Click on the map icon on the bottom of the screen.

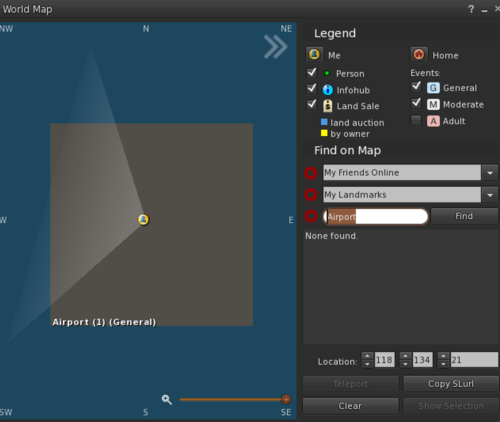
Leave all options as default in the world map view apart from the box next to Find. Use http://www.randomlettergenerator.com/ to determine what letter to enter into the box. In my case, I got the letter O. Enter this here and click Find.
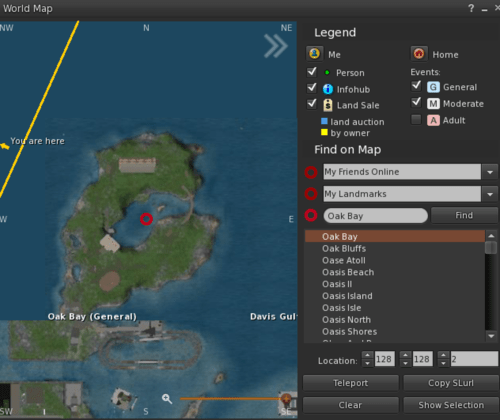
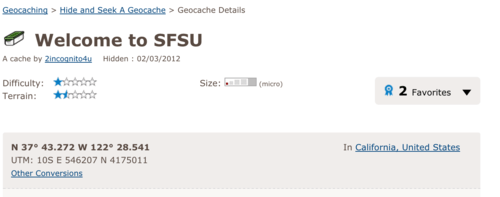
Change the numbers in the three boxes next to Location below the listings to the first three whole numbers in your Geocache coordinates. For example, if your coordinates were N 37° 43.272 W 122° 28.541, you would enter 37 into the first box, 43 into the second box, and 272 into the last box.
Scroll up and down the list of locations with your eyes closed and count to 10. Open them and teleport to the location you happen to stop on. If it will not allow you to teleport, start the process of scrolling and counting to 10 again until the teleport is successful.
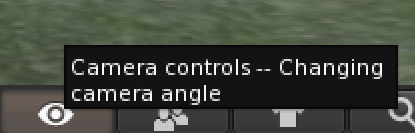
You may fall from the sky after teleporting. Wait until your avatar stops moving and you land on a flat surface. Click the eye on the bottom of the screen for camera controls. Do not move your avatar at any time.
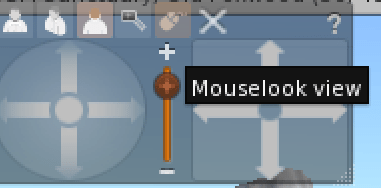
Select Mouselook view from the box that appears. Again, don’t move from your initial position to attempt to make the view more attractive.
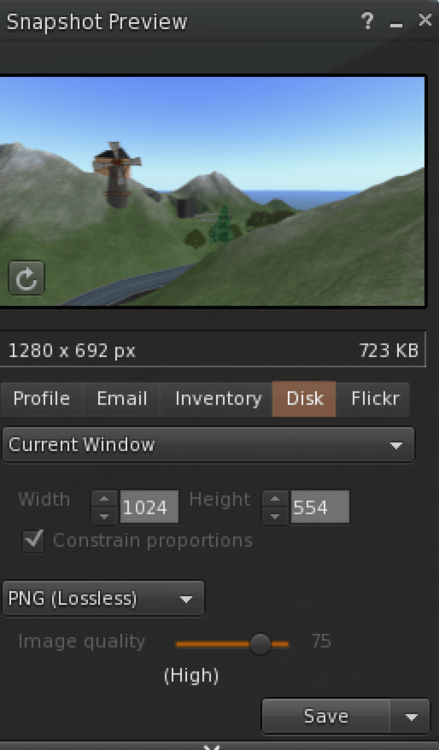
Press Command+Shift+S if you are on a Mac or Ctrl-Shift-S if you’re on Windows to take a photo and bring up the snapshot window. Press Esc twice to regain control of the mouse and save the file to your computer.
9. Bringing Photo into Digital Environment
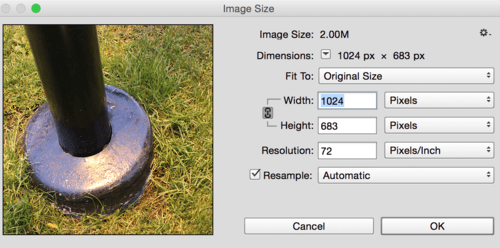
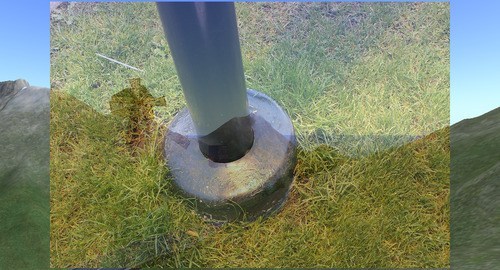
Upload the photo you took of the cache or its environment to your hard drive. Open both the Second Life screenshot and the cache/environment photo in Photoshop or another photo editor of your choice that allows for opacity settings. Adjust the width of the cache/environment photo to be 1024×683 (close to the default of the Second Life screenshot, but not quite).
Copy and paste the cache/environment photo over the Second Life screenshot. Go to https://www.random.org/ and set the minimum at 20 and maximum at 60. Set the opacity of the cache/environment photo layer at the result. Save the file and the result is your finished image. Flip a coin to determine whether the edges of the Second Life image underneath will be cropped (heads) or not (tails).
Another result:
/End of instructions